
While workflow actions offer a lot of options for updating records, it's not easy to query for or identify records that were updated on a particular date. That's where the Contact Note action can come in handy, since Contact Notes always have a date associated. By using Automation to add Contact Notes, you can easily identify supporters who took action on a specific date. You can see an example in this training webinar on using Automation to maintain your data.
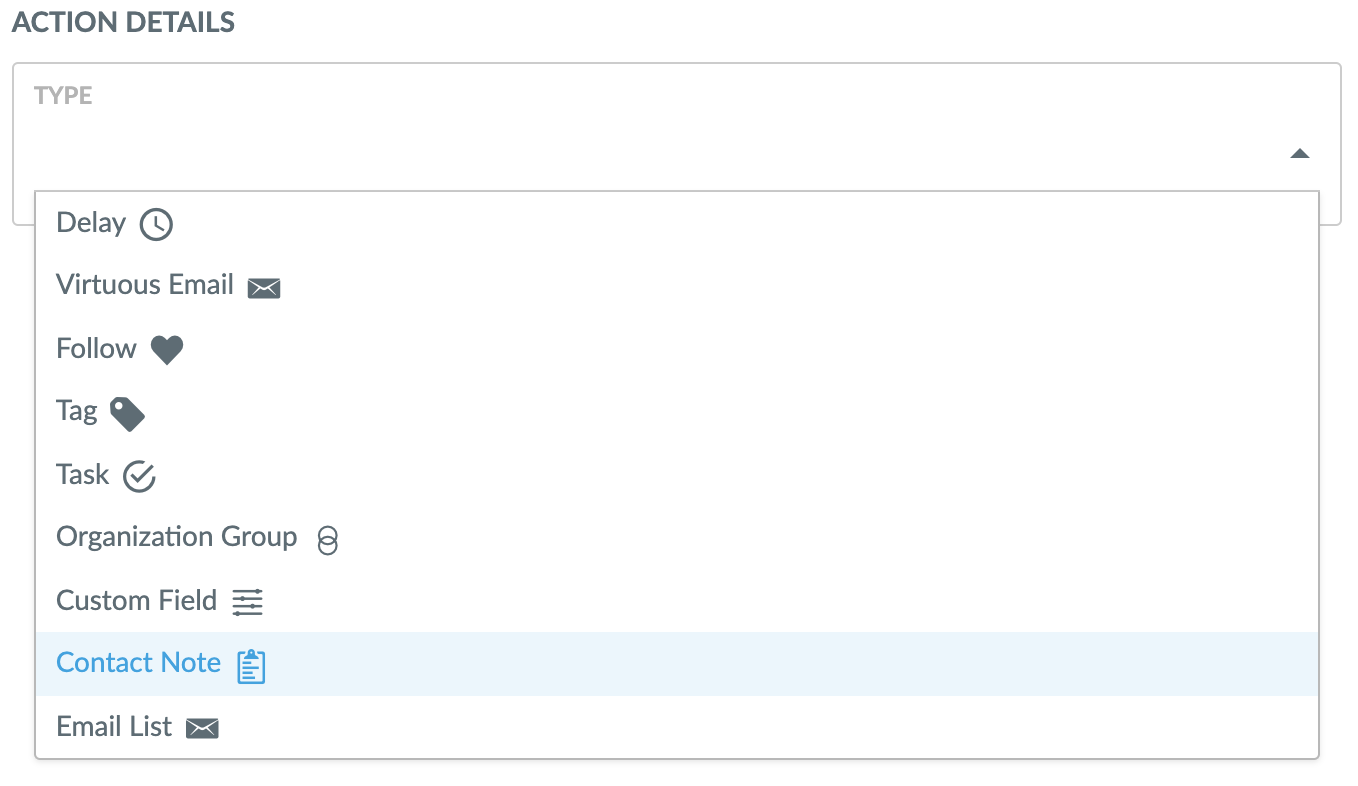
To add a Contact Note action to any workflow step, click on the "Add an action" button.

This will bring up the Action Details form. Select "Contact Note" from the drop-down list to set the type.
Then enter the details for the Contact Note to be created.
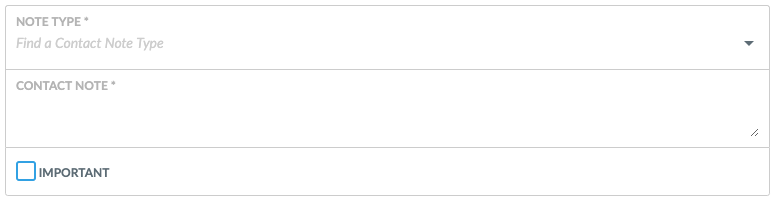
First, you'll need to select a Note Type. If this note is to be used to track a specific action, like the date when a Contact first offered to be a volunteer, then it's best to create a custom Note Type, like "Volunteer Registration." Then, you can easily identify everyone who registered as a volunteer within a particular time frame.
Once you select a Note Type, you'll also need to enter the text that will be populated in the body of the actual note itself. The same text will be used in every note, so make sure the content is clear and easy to identify.
If you'd like your Contact Note to be flagged as important, you can check the "Important" box. Important notes always appear in a red box hear the top of the screen when viewing a Contact record, and are also visible when viewing Contact details as part of gift processing in the Gift & Contact Import tool.